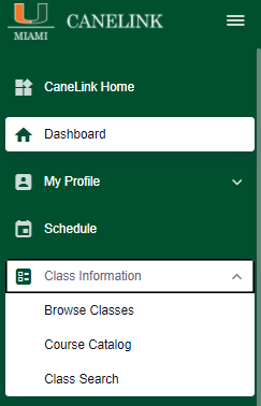
Yes. You can log in and use CaneLink from a desktop, laptop computer, or mobile device. To log in, visit canelink.miami.edu.
The student self-service experience within CaneLink has a new user interface and easy access to the following:
Those with proxy access, e.g., for delegates or parents, will continue using the classic CaneLink experience (previously known as "full site" on the CaneLink home page) to access a student's record, using the "CaneLink for Proxy" tile on the CaneLink home page.
On the CaneLink Dashboard menu page, click on the following menus for direct access: Housing and Dining, Cane Card, Graduation, and Academics. Alternatively, click on the Important Links (Resources) tile on the CaneLink home page which will route you to the page where important links are also listed.
Please visit the 'Cane Kickoff Orientation page on the Student Affairs Orientation & Commuter Student Involvement website to register for orientation.
No. Please visit the Student Affairs Housing & Residential Life website to apply for housing.
Yes. You will still log in to Workday to access and view your student employee related data.
To learn more about your privacy, please visit the School of Law's Student Consumer Information page.
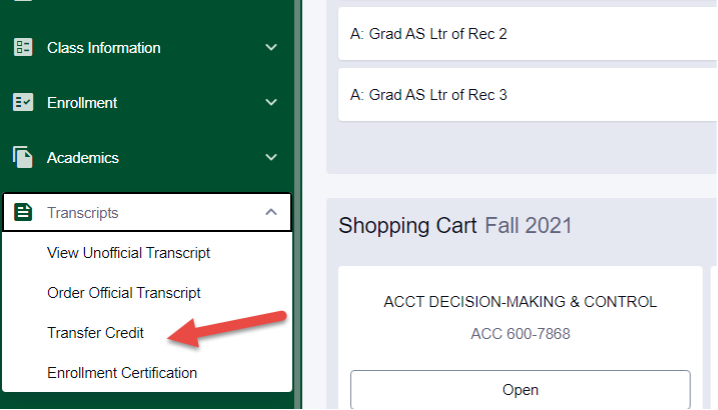
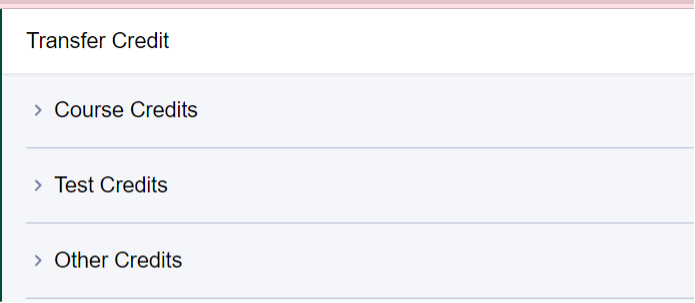
On the CaneLink Dashboard menu page, click on the Transcripts tab and select Transfer Credit. Select from one of the three types of transfer credits. If you have transfer credits from another institution, select the Course Credits option. You will see the information that has been evaluated for your UM transcript. If your transfer credits are based on outside test scores, e.g., AP, IB, CLEP, select the Test Credits option. If you have transfer credits from other sources, select the Other Credits option. If you have any questions, please contact your Academic Advisor.
An academic advising hold will be placed on your record if you are required to see an Advisor before registering for classes. On the Dashboard landing page, you will see the Holds section with any current holds listed. Once you have met with your Advisor, the hold will be removed, and you will be able to enroll in your classes.
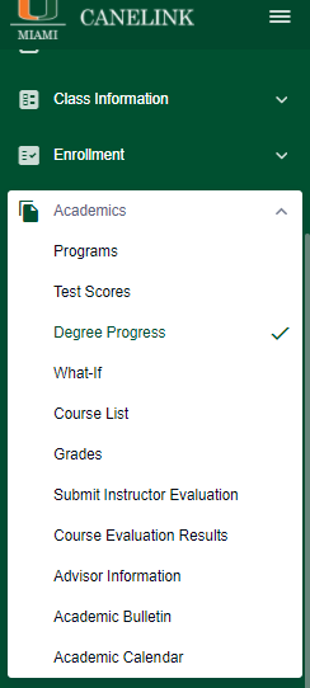
On the CaneLink Dashboard menu page, click on the Academics tab and select Advisor Information. Your Academic Advisor will be listed on this page. If no advisor is listed, notify the dean's office in your school or college.
On the CaneLink Dashboard menu page, click on the Academics tab and select Grades to access and view your grade point average (GPA).
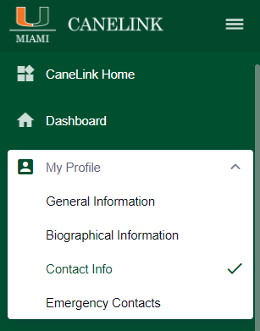
On the CaneLink Dashboard menu page, click on the My Profile tab and select Contact Info. You can click on the Add Address and Add Phone number buttons to update your contact information.
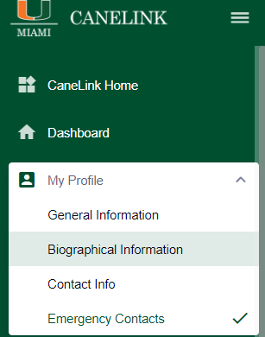
On the CaneLink Dashboard menu page, click on the My Profile tab and select Emergency Contacts. You can click on the Add Emergency Contact button to update your contact information.
On the CaneLink Dashboard menu page, click on the Financials tab and select Direct Deposit/Bank Account to enroll in direct deposit.
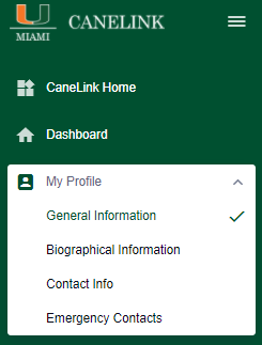
Your University identification number (your C number or C#) has not changed; however, you also have a second identifying number in CaneLink that may be used by your faculty. This number, sometimes referred to as your emplID, can be found by clicking on the CaneLink Dashboard menu page, selecting the My Profile tab and clicking General Information.
Enrollment Dates are the dates you will be allowed to access the system to enroll in classes for a given term. You could have multiple Enrollment Dates.
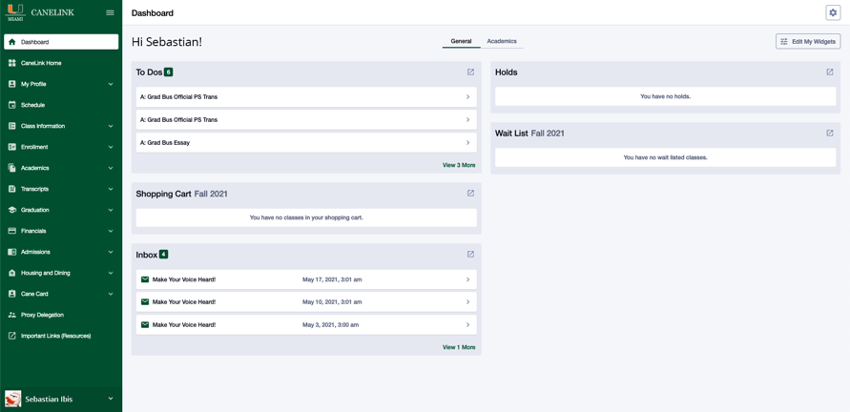
The new Dashboard is your CaneLink landing page, with instant access to holds, to dos, shopping cart, wait list, and message inbox.
CaneLink has three options available to search for classes located in the Dashboard menu page under the Class Information tab. You can use any of the following:
The Academic Planner is a tool for you to use to plan out the courses you may want to take each term. You can select courses from the course catalog and organize the courses by terms. The Academic Planner can be used for term-based or multi-year planning purposes and courses can be placed in your Planner independent of actual course offerings. Once courses are organized in your Academic Planner, you can search for classes scheduled for the term for which you would like to register once the Schedule of Classes has been made available for that term.
The Shopping Cart is a tool that allows you to store courses in which you intend to enroll in a specific term. Once the classes are in your Shopping Cart and your Enrollment Date(s) has/have arrived, you can enroll directly from your Shopping Cart.
The Swap feature allows you to identify a class that you are currently enrolled in and trade it for an open class that you would prefer. You cannot set up a Swap for a class in which you are already on the waitlist. You must drop out of the waitlist, and then set up a swap. Note: Swap does not guarantee that you will be enrolled in your waitlist class(es).
If you are enrolled in a class that is your second choice, you can Swap that class for a wait list class. Use this feature if you are enrolled in a class, but would prefer a different class that is taught on the same day and time, or if you are already enrolled in the maximum number of credits for a term and want to still get on a wait list. Note: Swap does not guarantee that you will be enrolled in your wait list class(es).
This new feature gives students an easy way to quickly build a class schedule that accommodates their multiple activities. Noteworthy is the schedule builder's ability to visually display multiple combinations of classes to ease the process of choosing their desired schedule. This feature allows students to filter classes based on campus, term, subject, times of day, and desired breaks. On the CaneLink Dashboard menu page, click on the Enrollment tab and select Schedule Builder.
The Degree Progress Report (DPR) is a tool that lists all the classes you are required to complete to satisfy graduation requirements. All the courses you've completed are listed in this document and can be viewed as a graph or detailed list. To view your Degree Progress Report, on the CaneLink Dashboard menu page, click on the Academics tab and select Degree Progress from the list. Note: The Degree Progress Report is one tool used for evaluating whether you have met the requirements for your degree. There is no guarantee that the Degree Progress Report includes all exceptions, course substitutions, waivers, or transfer credit. It is the responsibility of students to meet with their advisors to verify that they meet degree requirements per their Academic Bulletin.
A hold will be placed on your record if you are required to meet an obligation before registering for classes. On the Dashboard landing page, you will see the Holds section with any current holds listed. Once you have met requirement for the hold, the hold will be removed, and you will be able to enroll in your classes.
Once the enrollment capacity in a class is reached, the wait list functionality automatically becomes available. Students may then elect to add themselves to the wait list. The process runs on classes in sequential order based on course ID, course offering number, term, session code, and class section. The wait list is first come, first served, and runs nightly. Note: If you do not meet the pre-requisites for a course, or there is a scheduling conflict, you will be skipped over on the waitlist. It is imperative that you validate courses from your shopping cart prior to adding them to your wait list. Schools will be monitoring wait lists and opening additional seats in the section/class as needed.
The process runs nightly.
The wait list option is available once all seats in a class have been filled and the section closes. If you include closed classes in a Class Search, you will see the wait list information listed and will have the option to add yourself to the wait list.
On the CaneLink Dashboard menu page, click on the Enrollment tab and select View Wait List. You can view your wait list position number from here.
You can wait list for multiple sections of the same class, with the following stipulations:
You will not be enrolled from the wait list if:
Important: If you are not enrolled from the wait list due to any of these issues, you will be passed over and the next eligible student on the wait list will be enrolled.
You cannot get on a wait list until your enrollment appointment occurs. The last day to get on a wait list will be the last day to add classes as found on the Academic Calendar.
You will not be notified if you are enrolled in one of your wait list classes. It is recommended that you monitor your class schedule each morning by logging into CaneLink and reviewing your Class Schedule.
Reserve Capacity is used when seats are reserved in a class for particular groups or classes of students. Typically, you will see seats reserved for students or seniors from a specific major. If a class has a reserve capacity and the only open seats are restricted, and you do not meet the restriction criteria, you can get on a wait list for the class. Note: You will only be enrolled in the class if an unrestricted seat becomes available.
The enrollment process does not check for a time conflict when you wait list a class. When the enrollment process runs, you will not be enrolled in the class if a time conflict exists. You must drop the conflicting class if you want to be enrolled from the wait list. Always validate classes in your shopping cart prior to adding them to your wait list. Note: Use the Swap feature when wait listing for a class that conflicts with a class that you are enrolled in. That way, if a seat opens in the closed class, you will be automatically dropped from the previously enrolled class.
You can wait list for up to 21 credits at a time. You cannot exceed your enrollment limit when you are enrolled from a wait listed class.
No. Tuition is only calculated based on classes for which you are enrolled.
Yes, you can remove yourself from a wait list by dropping from the wait listed section during the add/drop period. On the CaneLink Dashboard menu page, click on the Enrollment tab and select Drop Classes. All wait listed courses will be listed here and can be selected and dropped.
On the CaneLink Dashboard menu page, click on the Proxy Delegation tab and select the Delegate Access to a New Contact button. You must grant approval for all proxies and select which services proxies may access on your behalf.